How to Build Your First Decentralized Voting Smart Contract on Stacks Blockchain
A comprehensive step-by-step tutorial on how to build your first decentralized Voting Smart Contract on stacks blockchain.
Table of contents
- Introduction
- Deploying our Voting contract
- ⚒️ Interacting with our Voting contract
- Finally...
- Additional Resources
Introduction
This is a comprehensive step-by-step tutorial on how to build your first decentralized voting Smart Contract on the Stacks blockchain using the Clarity programming language.
In this tutorial, you will learn:
How to setup a Clarity Development Environment,
How to write a decentralized Smart Contract using Clarity,
How to deploy your contract on a test network.
As a matter of bonus, you will also gain insights on:
What 'Stacks' is and some of its unique functionalities,
The basics of the Clarity programming language, and
How to test and optimize Clarity Smart Contracts.
Let's start first by understanding the relationship between voting and blockchain ;
🗳️ Voting on Blockchain

A blockchain, generally, is an open-source, decentralized, and transparent digital ledger (like a virtual cashbook) that is immutable and distributed across a network of computer systems.
In other words, a blockchain can be likened to a digital cashbook that is transparent (i.e. everyone can read its content), immutable (i.e. it is nearly impossible to alter or manipulate transactions recorded in it), and decentralized (i.e. it is not controlled by one single entity).
Our voting system, as we presently know it, often involves several electorates (i.e. voters) coming together to elect candidates of their choice to fill a position, role, or office.
And this happens in schools, groups, small to large-scale organizations, corporations, and institutions.
But the problem, as history and research as shown us, is that the traditional way of voting can easily be rigged and voting results can be manipulated by corrupt individuals - thus defeating the underlying idea of the voting exercise.
Although the rise of Electronic Voting (e-voting) systems has tried to solve this problem, the obvious issue with this has been that the programs are mostly deployed on a centralized/single server - which can be easily attacked by prying hackers. Also, since the code for most e-Voting applications is not open-source, the code logic can easily be manipulated without raising suspicion.
But with the integration of blockchain and smart contracts, all of these become past.
Put together, this 'partnership' solves the 3 major problems ravaging our present voting system:
Smart Contracts extinguish alterations of results;
It eliminates issues surrounding the transparency of result collation and computation; and
Its decentralized and open nature boosts voters' trust and confidence in the election process - both at micro and macro levels
Thus, for us to build a smart contract on Stacks, we must first understand the Stacks blockchain and the technical architecture it is premised upon.
Introduction to Stacks
P.S. If you're already familiar with the Stacks Ecosystem, feel free to skip the introductory part.
Stacks is a Layer 1 blockchain that aims at unleashing Bitcoin's full potential.
Stacks makes the impossible possible by enabling decentralized applications (dApps) and smart contracts developers to build on the bitcoin blockchain and enjoy bitcoin's functionality and security, without modifying bitcoin itself.
Additionally, Stacks utilizes the Proof-of-Transfer consensus mechanism, which uses the cryptocurrency of an established blockchain (bitcoin in our case) to secure a new blockchain.
This way, Stacks builds upon bitcoin's existing energy usage without incurring additional energy costs. Making it consume less energy than proof of work and proof of stake chains.
To sum it up, Stacks's objective is to bring web3 functionality to Bitcoin.
👷 Understanding the Stacks Development Environment
To build on the Stacks blockchain, there are some helpful tools made available to us, and understanding how to use them early on will be a good head start.
Hiro Wallet
Clarity
Clarinet
Hiro Wallet
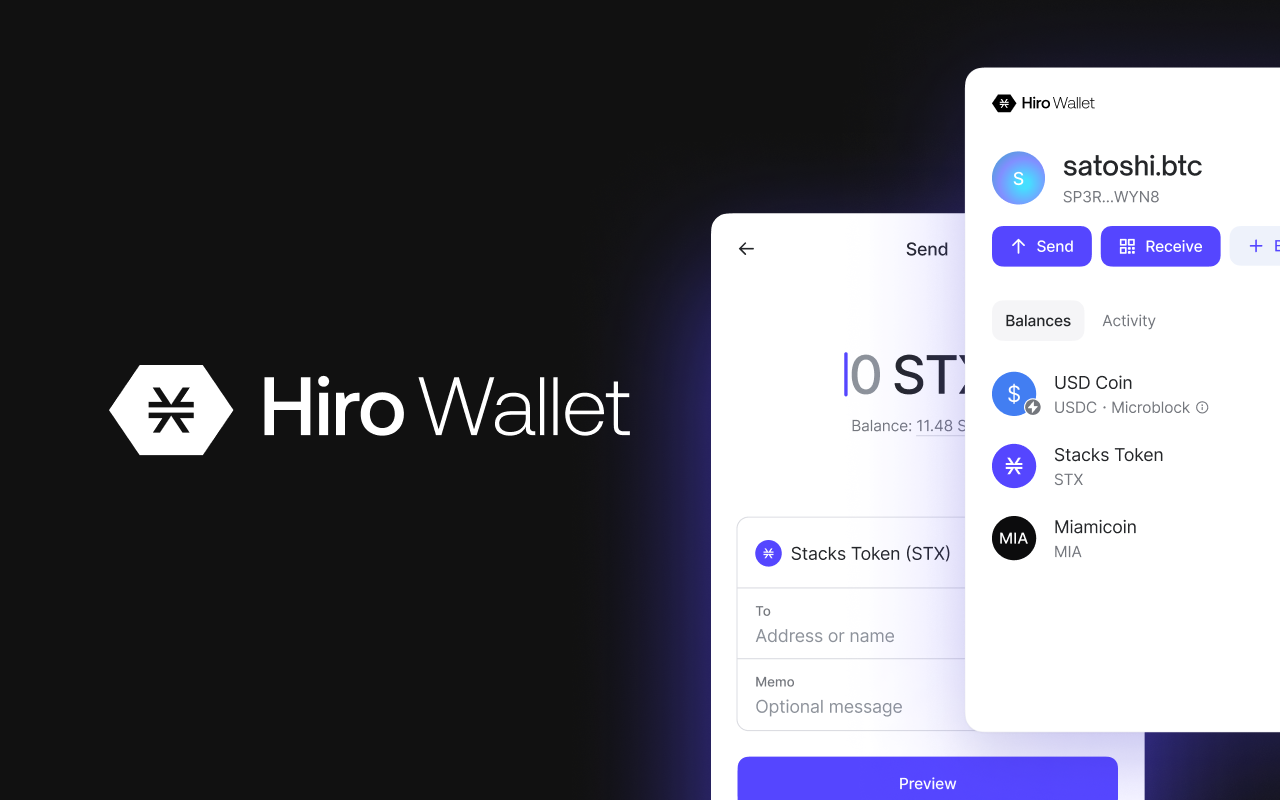
If you're already familiar with the Ethereum Ecosystem, then understand that Hiro Wallet is to Stacks, what Metamask is to Ethereum.
Hiro Wallet is a self-custodial wallet (i.e. a decentralized wallet where you own your keys) that grants developers and builders access to the stacks ecosystem.
Hiro wallet enables you to store, stack, and connect with decentralized Apps in the Stacks ecosystem, from your browser or desktop.
N.B: Learn more about the Hiro wallet here.
Follow the steps provided below to download the Hiro wallet, create an account and get faucet tokens:
Let's get started!
Click here to download the Hiro wallet as an extension for Chrome/Edge/Brave or if you use firefox then download from here.
Once the download is complete, open it and Click on "Create new wallet".

Ensure you save your secret key somewhere safe, then click "I've backed it up".

Create a password for your account and click "Continue"
You'd be prompted to this screen, let's skip that for now. Click "Skip" - at the top right corner

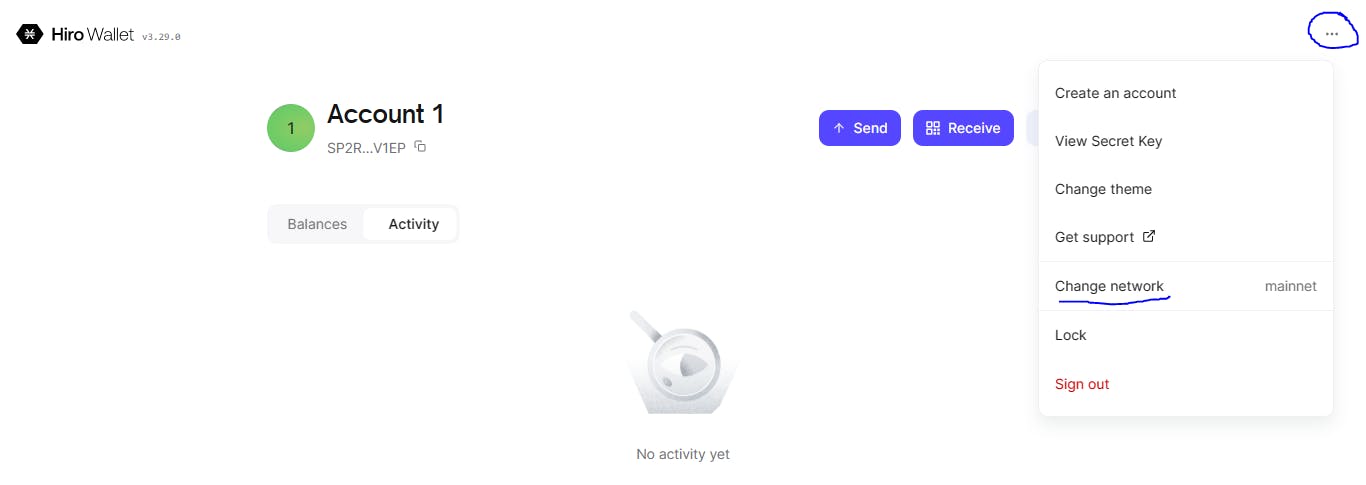
Our focus is to deploy on the test network, so click the "Options" icon in the top right corner and then click on "Change Network". Then, Change the network to "Testnet"
Let's get you some test Stacks (STX) tokens so you can deploy contracts on the Stacks blockchain and make transactions.
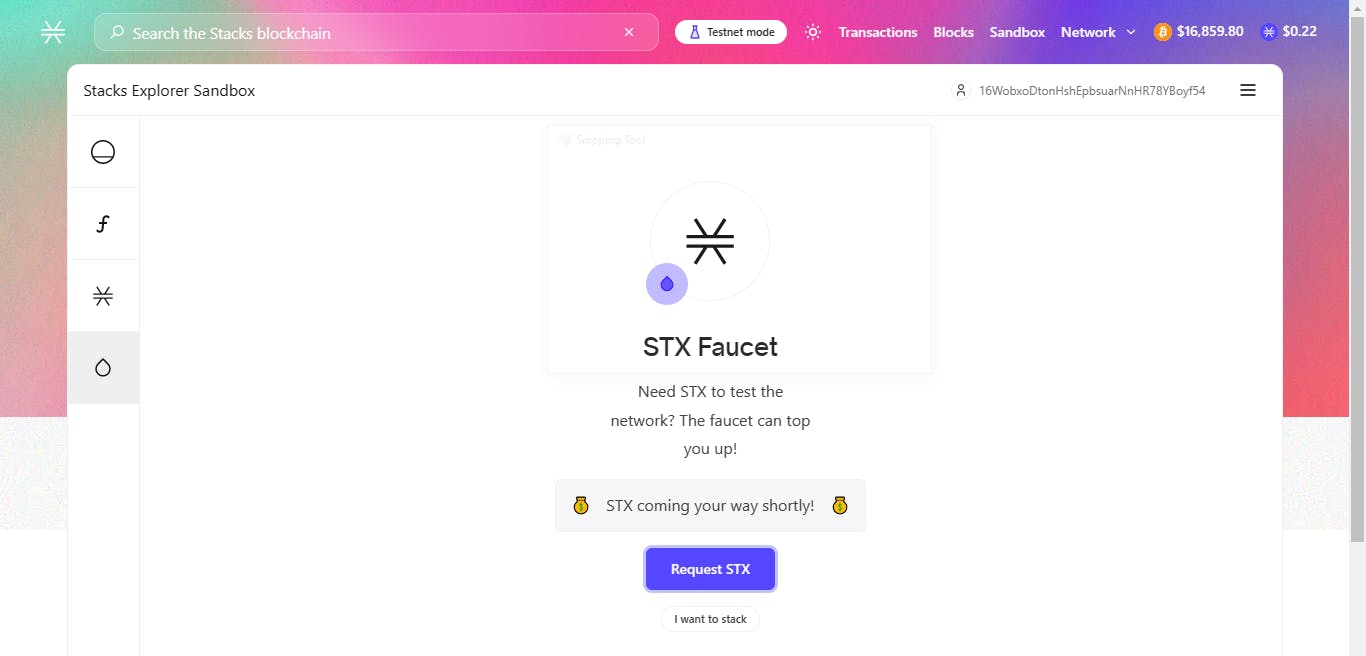
Visit Stacks Faucet, connect your wallet, then click "Request STX"
Now open your wallet, under the "Activity Tab" you will see that 500 STX tokens "are coming your way". The lightning sign means that the transaction is still pending and you'll receive the tokens once a new block is mined - takes about 10 minutes.

Once the next block is mined, the STX tokens will show up in your "Balances" tab and the "lightning" icon will change to the "received" icon in the "Activity" tab.


P.S: I had about 1,000STX in my wallet already
And that's it! You're now ready to deploy smart contracts on the testnet and interact with dApps on the Stacks Blockchain.🚀🚀
Clarity
Clarity is a programming language used for writing smart contracts that run on the Stacks blockchain.
Unlike other languages like Solidity, Rust, and JavaScript, Clarity does not have a compiler; it broadcasts contracts exactly as they are written by developers.
Clarity is very safe to write smart contracts as it, by default, safeguards common vulnerabilities like overflows, underflows, and re-entrancy attacks, which are dominant in other smart contract languages.
The Clarity syntax is also less ambiguous and easily understandable so you can get ahead in Clarity in no time especially if you already have some programming
experience.
N.B: Learn more in Clarity's Documentation
Clarinet
Clarinet is a CLI (command-line interface) that helps you develop and test smart contracts on the Stacks blockchain.
Take Clarinet as your Hardhat, Brownie, or Truffle in the Ethereum ecosystem.
The Clarinet CLI is the toolkit that sets for you a powerful development environment to build comfortably on stacks.
N.B: Learn more about Clarinet here.
👨🔬 Setting Up your Development Environment - (Online IDE)
Here, I'd be showing you how to quickly set up your Clarity smart contracts project using an easy-to-use Online Integrated Development Environment (IDE) called ClarityTools.
Introduction to ClarityTools
ClarityTools is a workbench for building smart contracts on the Stacks blockchain. It allows us to write, test and deploy Clarity smart contracts right from our browser without installing any software.
If you're coming from the Ethereum Ecosystem, ClarityTools is like Remix for the Ethereum blockchain - with some differences.
We will be using ClarityTools for the development and testing of our smart contracts.
🔎 Let's Explore ClarityTools
Visit https://clarity.tools/ you will see the screen below:
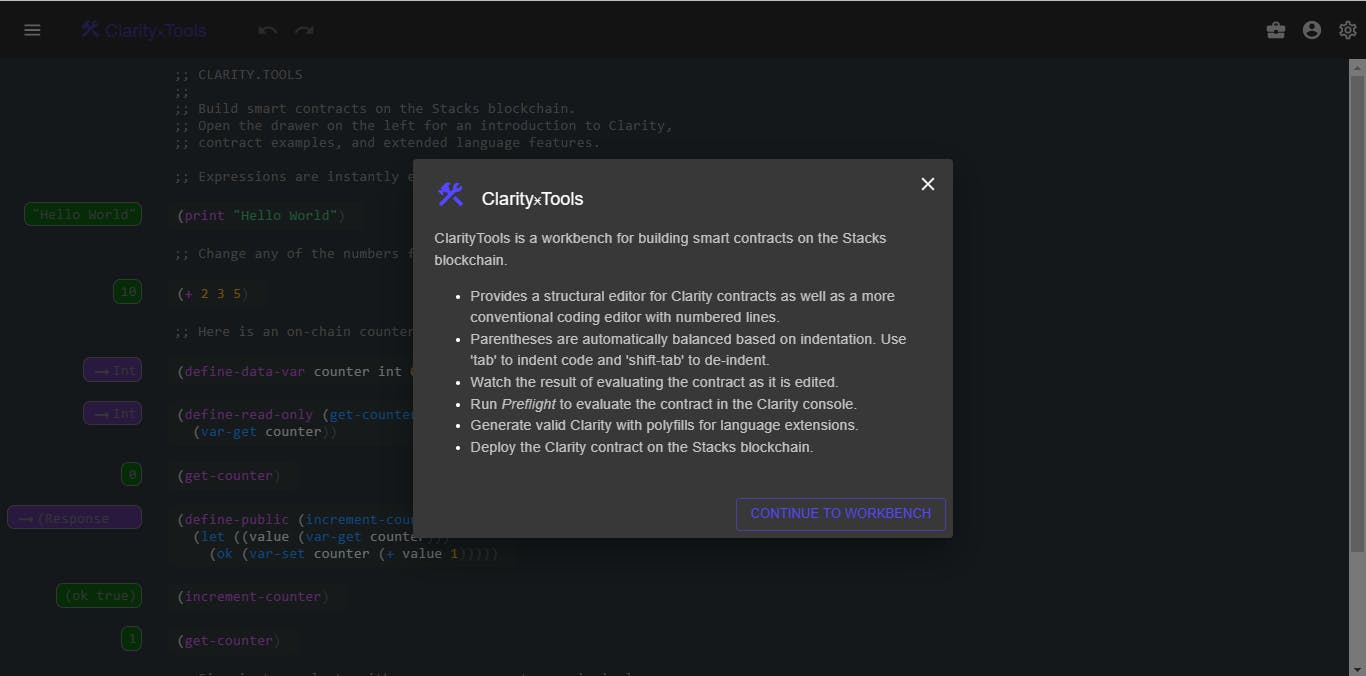
Click "Continue to Workbench". You'll find a sample Clarity smart contract that prints "Hello-World" and does some basic arithmetic. Also, on the left side of the screen, you can see the output of each function.
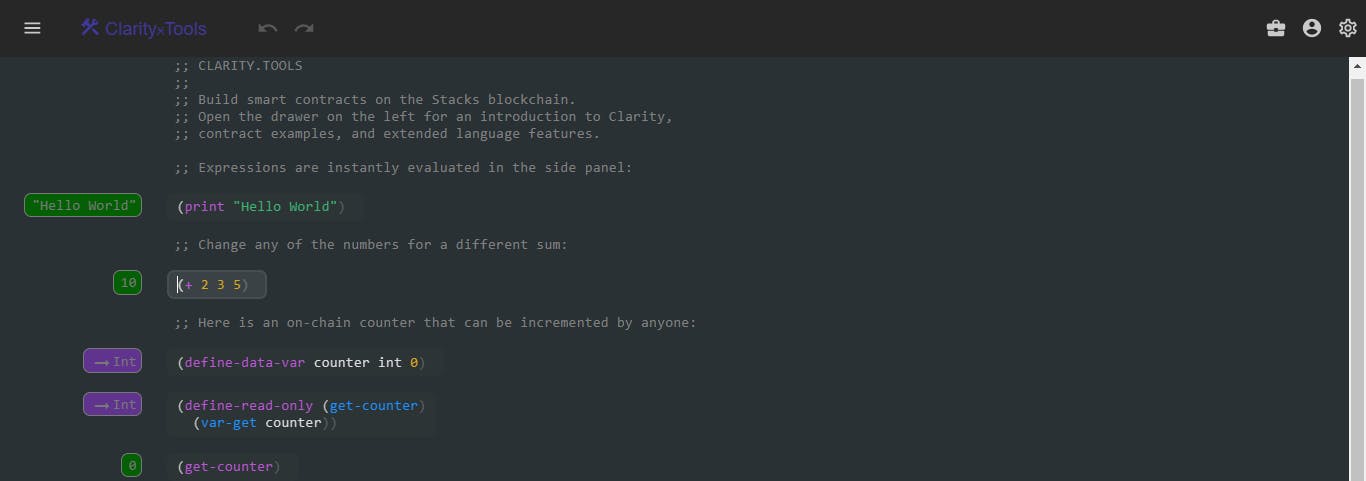
Note that, Clarity is an interpreted language so you need not worry about compiling your codes.
For now, we won't go into the details of the contract, we will just go through the basic interface.
If you're interested, click on the hamburger icon in the top left, and you will see a bunch of Clarity contract examples and tutorials about Clarity, you can check that out, but it's not necessary for now - we will cover that very soon.
Getting Ready for Deployment
To deploy the contracts right from your browser you need to connect your wallet with ClarityTools, to do that, just click on the "login" button in the top right corner and select the account with which you want to connect it.

Now if you click on the "Toolbox" icon in the top right corner, you should see a couple of options along with the option to deploy the contract on the testnet and the mainnet.
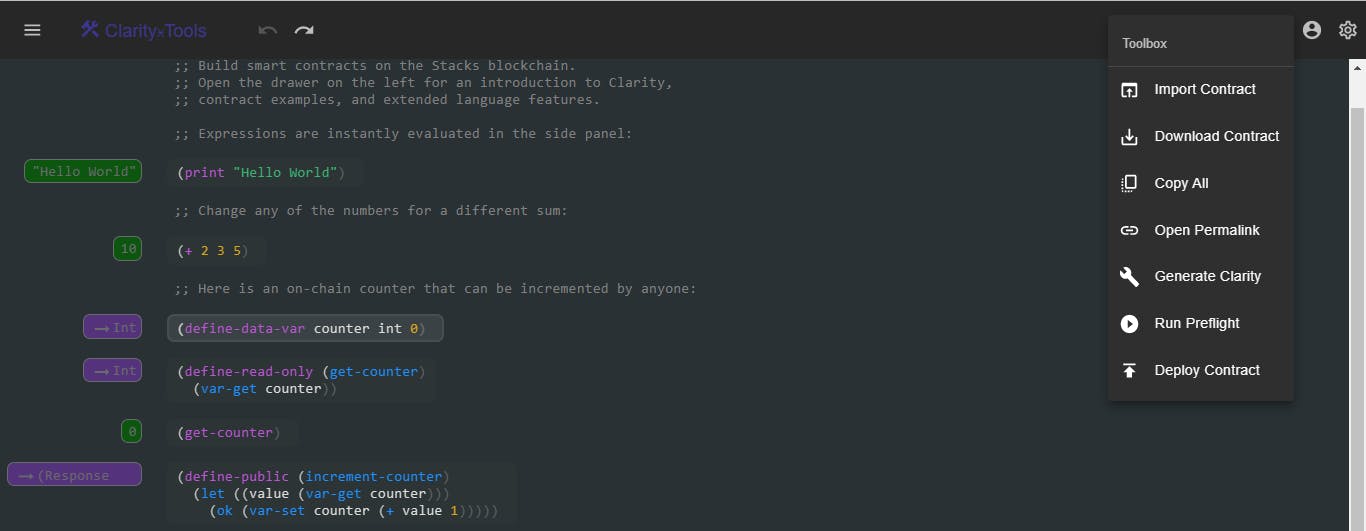
Now we can write, test, and deploy our contracts using ClarityTools🚀.
⚙️Pre-requisites
For this tutorial, you are required to have the following:
Set up your Hiro Wallet - the installation steps have been explained above;
Have some faucet STX Tokens in your Wallet; and
A Basic understanding of the Clarity Programming language - Don't worry, Even if you don't, you will be properly guided ;)
🗳️ Voting Contract Features
For this project, we will build a minimalistic voting contract that allows voters to vote for any candidate of their choice.
In this contract, you will be able to vote for either candidate1 or candidate2. Voters can only vote when voting is started and at the end of the voting period, we will be able to get the winner of the poll.
Checklist
Our voting mechanism will follow this flow:
We will pass in 2 default candidates
candidate1andcandidate2We will want to be able to start and end the voting process, so will pass 2 public functions
start-voteandend-voteplus a read-only function tocheck-vote-statusSince we have just 2 candidates, we will create 2 functions to vote for either
candidate1orcandidate2Also, we will require that voting is live to accept votes
Then, finally, we will create a function (
get-winner)that enables us to get the winner of the election.
Now, let's translate our thoughts into code 🚀🚀
💻 Writing our Voting Contract
- We will start by declaring the necessary variables.
Looking at our pseudo-code above, our first step is to declare 2 candidates and pass in default values. Although, we can achieve this by creating a tuple or a mapping to store candidate info such as candidate-name, principal (i.e. address), and vote-count into a unique Key ID. But, we will keep it simple for now.
To this end, we will declare each candidate variable using the keyword define-data-var give it a name: candidate1 and pass in a default value int 0
You can learn more about variable declaration in Clarity here
;; Variable declaration for candidate 1
;; N.B: In clarity, variable definition functions take this format:
;; (define-data-var variable-name var-type initial-value)
(define-data-var candidate1 int 0)
Let's do the same for candidate2 :
;; Variable declaration for candidate 2
(define-data-var candidate2 int 0)
N.B: In Clarity, a double semi-colon
;;is used to pass in code comments
Our next step is to create 2 public functions
start-voteandend-voteplus a read-only function tocheck-vote-statusN.B: Learn more about functions in clarity before proceeding.
Before creating our public functions, we will first define a variable called
vote-status:
;; vote-status takes in a default value '0'
;; it returns zero if voting is closed and '1' if voting is open
(define-data-var vote-status int 0)
Now, let's create our start-vote and end-vote functions.
;; start-vote
(define-public (start-vote)
  ( ;; Logic Here
    ))

;; end-vote
(define-public (end-vote)
  ( ;; Logic Here
    ))
In building our function, we use the keyword var-set to change the value of the vote-status variable to '1' - which signifies voting is open. The ok response keyword returns that the function call is valid, then returns the updated vote-status value using var-get.
We repeat the same value for the end-vote function Then, we create a read-only function to read the state of vote-status
;; a public function to set the voting process open
(define-public (start-vote)
  (begin
    (var-set vote-status 1)
    (ok (var-get vote-status))))

;; a public function to end the voting process
(define-public (end-vote)
    (begin
        (var-set vote-status 0)
        (ok (var-get vote-status))))

;; a read-only function to read voting status
(define-read-only (check-vote-status)
    (ok (var-get vote-status)))
- Now it's time to vote!! 🎉
We will create 2 public voting functions. One to vote for candidate1 and the other to vote for candidate2
To create our voting functions, let's start by defining our public functions.
;; candidate 1
(define-public (vote-for-candidate1) (
    ;; We  will write our function logic here
)
;; candidate 2
(define-public (vote-for-candidate2) (
    ;; We  will write our function logic here
)
For the logic of our voting functions, we will be doing 2 things.
First, we will require that voting is set live before a candidate can be voted for.
Second, if voting is live then we increment the candidate's vote by 1.
Checking vote-status
In clarity, we can set conditions in different ways. There are two(2) very common ways of doing this: by the if/else statement or through the asserts! method.
N.B: We will go through both methods, but we will stick to the
asserts!method. You will see why soon.
The if/else Method
To begin writing our function logic, we use the keyword begin in clarity.
Next, we will set a condition that if vote-status is equal to 1, the candidate's votes count should be incremented by 1 else, it should be incremented by 0.
In other words, by using var-set, the function will increment the candidate's votes count by 1 only if vote-status is equal to 1, using the is-eq keyword.
;; Public function to vote for candidate 1
(define-public (vote-for-candidate1)
    (begin
        (var-set candidate1 (+ (var-get candidate1) (if (is-eq (var-get vote-status) 1) 1 0))) ;; increment count by 1 if voting is live, else add 0
        (ok (var-get candidate1))))


;; Public function to vote for candidate 2
(define-public (vote-for-candidate2)
    (begin
        (var-set candidate2 (+ (var-get candidate2) (if (is-eq (var-get vote-status) 1) 1 0))) ;; increment counts by 1 if voting is live
        (ok (var-get candidate2))))
The asserts! method
In Clarity, the asserts! function handles control flows and errors in a more precise and legible manner. They allow you to create short circuits that immediately return a value from a function, ending execution early and thus skipping over any expressions that might have come after.
It takes a boolean expression and asserts its evaluation. If the expression is true, it proceeds with the program execution, but if it is false, it throws an error and quits the current control flow.
So, in our case, we are asserting that vote-status is true (i.e. returns 1) before a candidate can be voted for. So our code should look like this:
;; The asserts! function follows this syntax:
;; (asserts! (a boolean condition - to be true or false) (err value))
;; N.B: Here we are asserting that vote-status is-eq 1
(asserts! (is-eq (var-get vote-status) 1) (err "Voting is not live!")
Let's now implement this in our voting functions:
;; Public function to vote for candidate 1
(define-public (vote-for-candidate1)
  (begin
    (asserts! (is-eq (var-get vote-status) 1) (err "Voting is not live!"))
    (ok (var-set candidate1 (+ (var-get candidate1) 1)))))

;; Public function to vote for candidate 2
(define-public (vote-for-candidate2)
  (begin
    (asserts! (is-eq (var-get vote-status) 1) (err "Voting is not live!"))
    (ok (var-set candidate2 (+ (var-get candidate2) 1)))))
As you have now seen, the if/else method is a bit verbose and confusing to read. Although we will still arrive at the same result, for the sake of clarity, design and readability, we will stick to the
asserts!method.
- Lastly, let's create a
get-winnerfunction, which returns the candidate with the highest number of votes as the winner.
;; Public function to get the current winner
;; function returns 0 if tie
;; returns 1 if candidate 1 has the highest votes
;; returns 2 if candidate 2 has the highest votes count
(define-read-only (get-winner)
  (ok (if (is-eq (var-get candidate1) (var-get candidate2)) 0 (if (> (var-get candidate1) (var-get candidate2)) 1 2))))
Putting it all together, your code should now look like this:
;; A minimalistic Voting Contract on the Stacks Blockchain
;; to vote for your favorite candidate (Candidate1) or (Candidate2)
;; and track who is winning the poll before voting ends

;; Variables for candidates 1 and 2
(define-data-var candidate1 int 0)
(define-data-var candidate2 int 0)

;; vote-status takes in a default value '0'
;; it returns zero if voting is closed and '1' if voting is live
(define-data-var vote-status int 0)

;; Read Only function to read voting status
(define-read-only (check-vote-status)
    (ok (var-get vote-status)))

;; Public function to set voting open
(define-public (start-vote)
  (begin
    (var-set vote-status 1)
    (ok (var-get vote-status))))

;; Public function to vote for candidate 1
(define-public (vote-for-candidate1)
  (begin
    (asserts! (is-eq (var-get vote-status) 1) (err "Voting is not live!"))
    (ok (var-set candidate1 (+ (var-get candidate1) 1)))))

;; Public function to vote for candidate 2
(define-public (vote-for-candidate2)
  (begin
    (asserts! (is-eq (var-get vote-status) 1) (err "Voting is not live!"))
    (ok (var-set candidate2 (+ (var-get candidate2) 1)))))

;; Public function to stop the voting process
(define-public (end-vote)
    (begin
        (var-set vote-status 0)
        (ok (var-get vote-status))))


;; Public function to get the current winner
;; function returns 0 if tie
;; returns 1 if candidate 1 has the highest votes
;; returns 2 if candidate 2 has the highest votes count
(define-read-only (get-winner)
  (ok (if (is-eq (var-get candidate1) (var-get candidate2)) 0 (if (> (var-get candidate1) (var-get candidate2)) 1 2))))
We are now ready to run, deploy, test, and interact with our smart contract!!
Deploying our Voting contract
Deploying to a Testnet
Having successfully built our voting contract, let's deploy and interact with our code to see how it works in real-time.
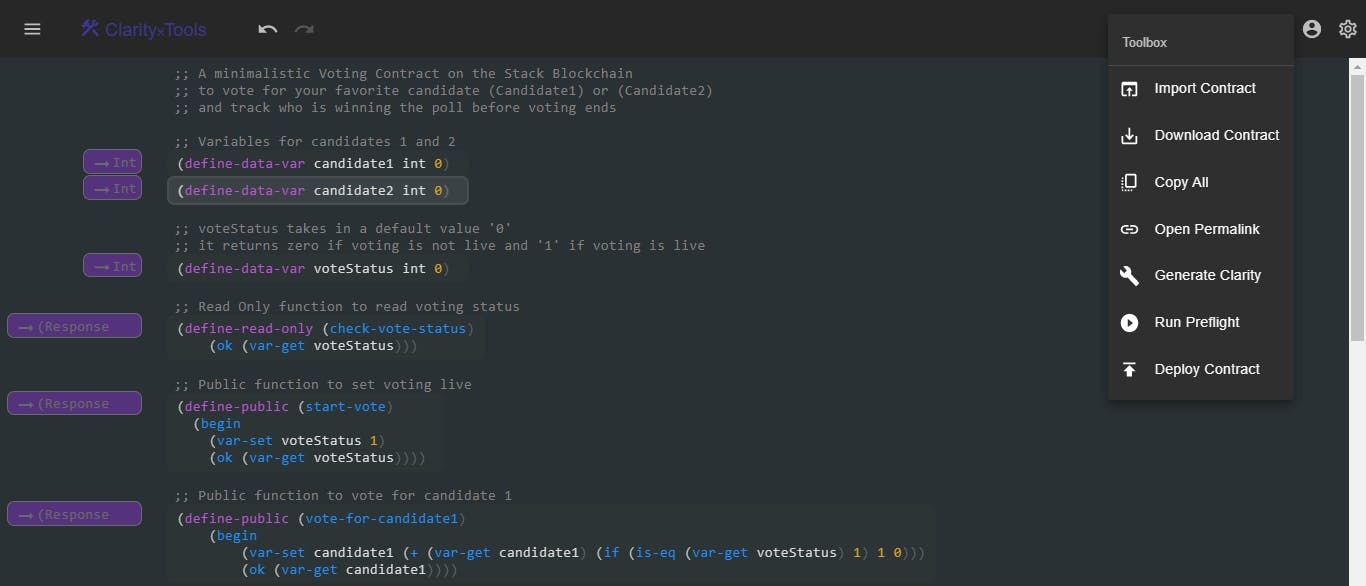
Copy the voting contract above, then navigate to https://clarity.tools in your browser
Clear out the preview contract provided by clarity and paste our voting contract
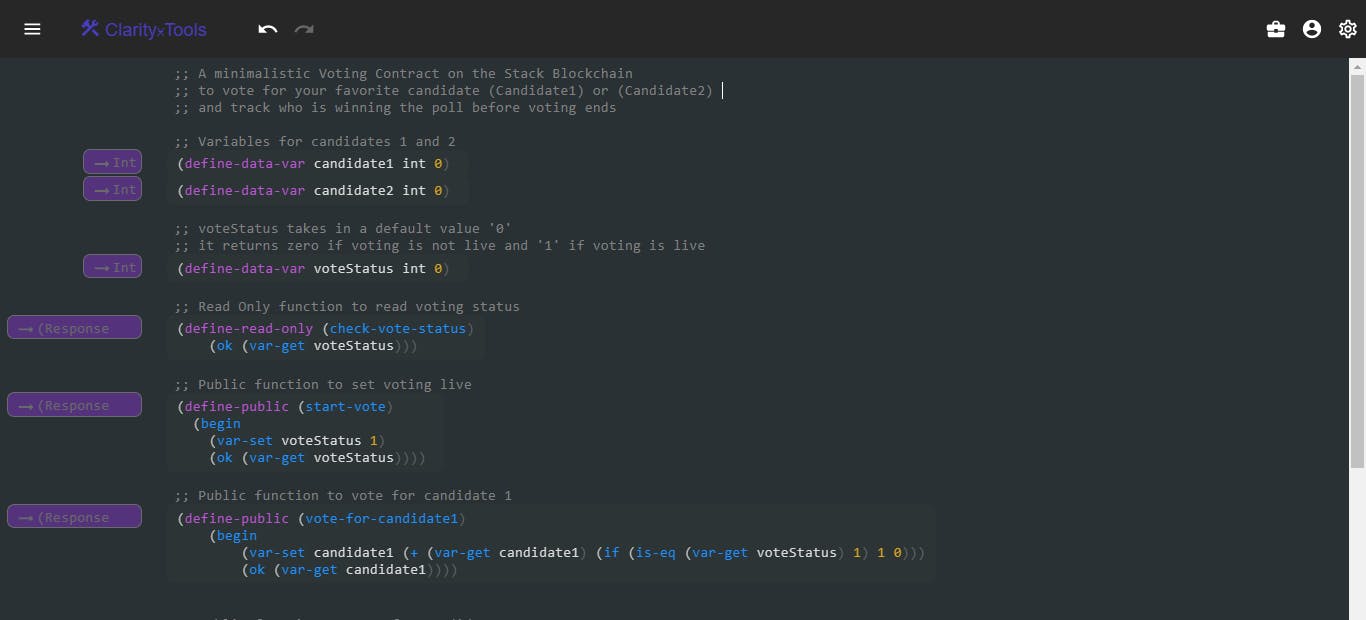
- Next, we can test our contract functions by calling them out in ClarityTools directly. The return values will appear on the left side of the screen.
Our contract appears to work exactly as planned! 👍 We can now delete the print test commands.
We can deploy our contract directly from ClarityTools using the Deploy Contract option in the toolbox - in the top right corner. But, because want to be able to give our contract a unique contract name, we won't be using it. We will use an alternative method instead.
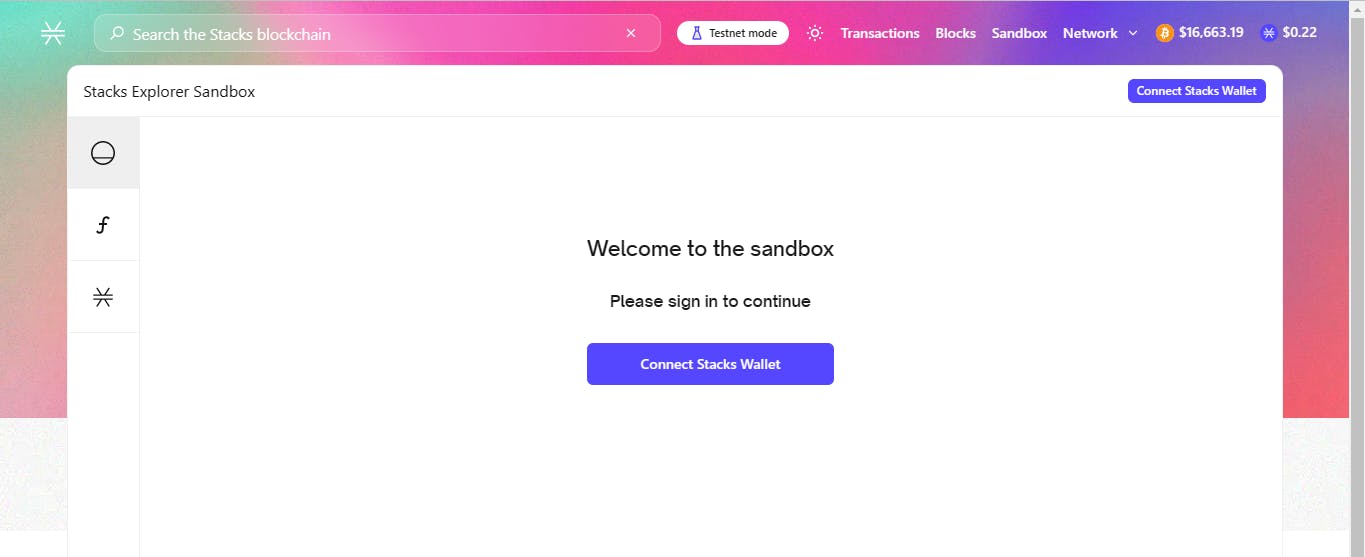
Again, copy the code and go to Stacks Explorer Sandbox. Stacks Explorer Sandbox enables us to quickly deploy and interact with smart contracts in a user-friendly GUI.
Connect your wallet by clicking on the "Connect Stacks Wallet" button.
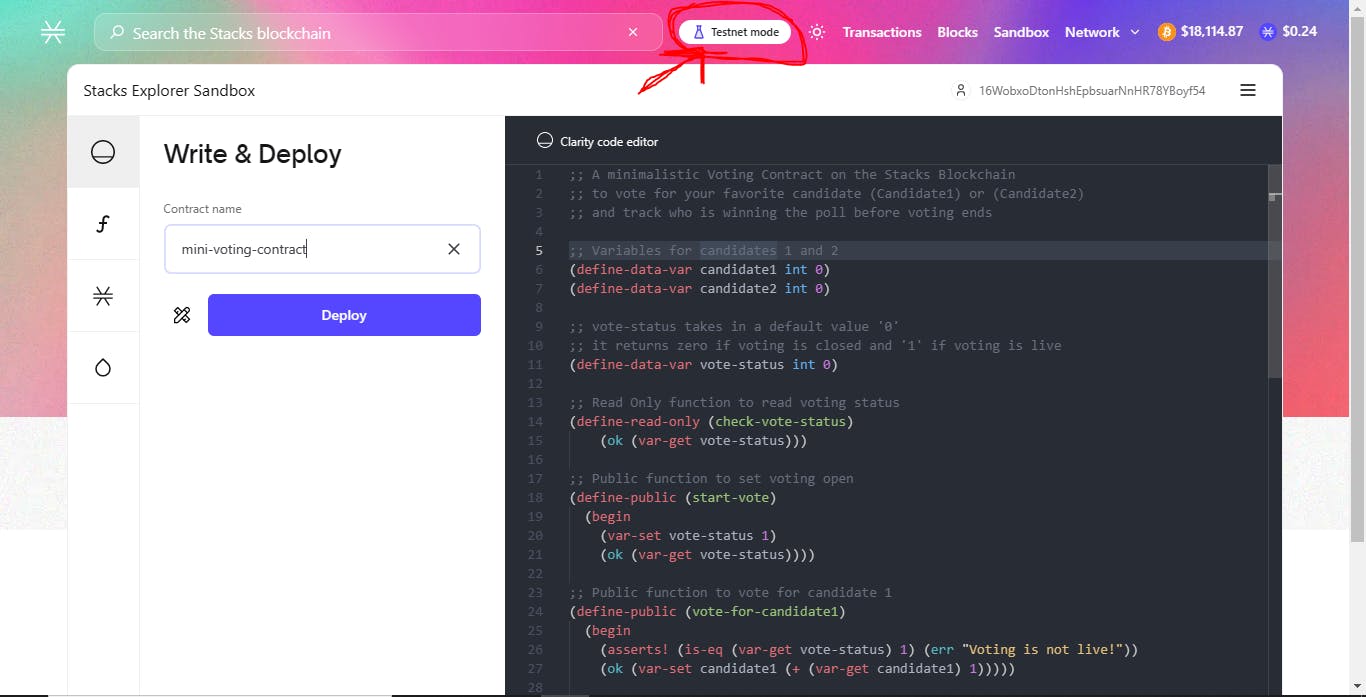
- Now, paste the contract code into Stacks Explorer Sandbox, and in the name field, give the contract any name of your choice. Let's just name it 'mini-voting-contract'.
N.B: Always Confirm you're in testnet mode
- Click the "Deploy" button to deploy the contract then click "Confirm" to sign the transaction in your wallet.
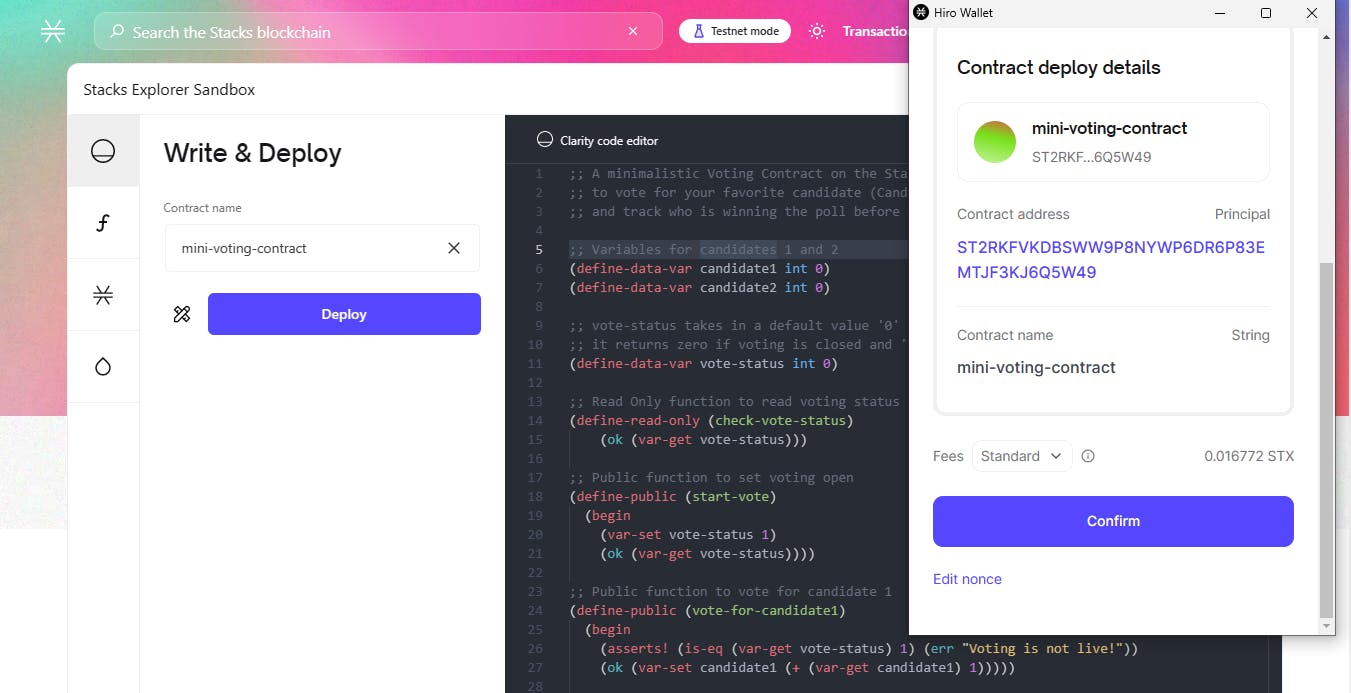
- After you sign the transaction, open your wallet then under the "Activity" tab you will see your contract name. Click it.
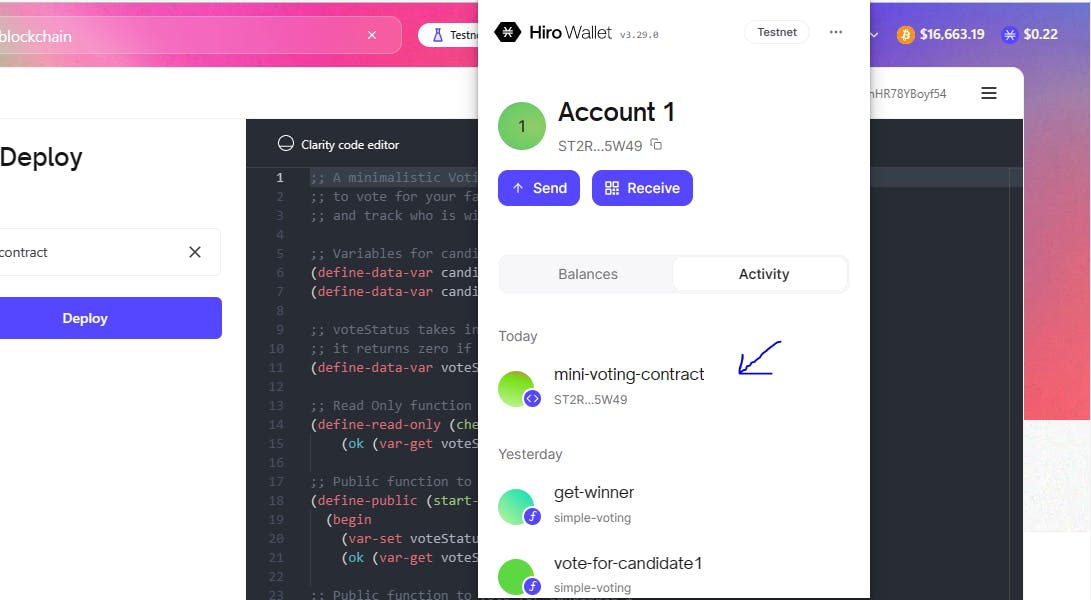
- Then, you will be directed to the explorer. Wait for a few minutes for the transaction to be confirmed - This should take around 10-15 minutes. Once it is confirmed, it should look this:
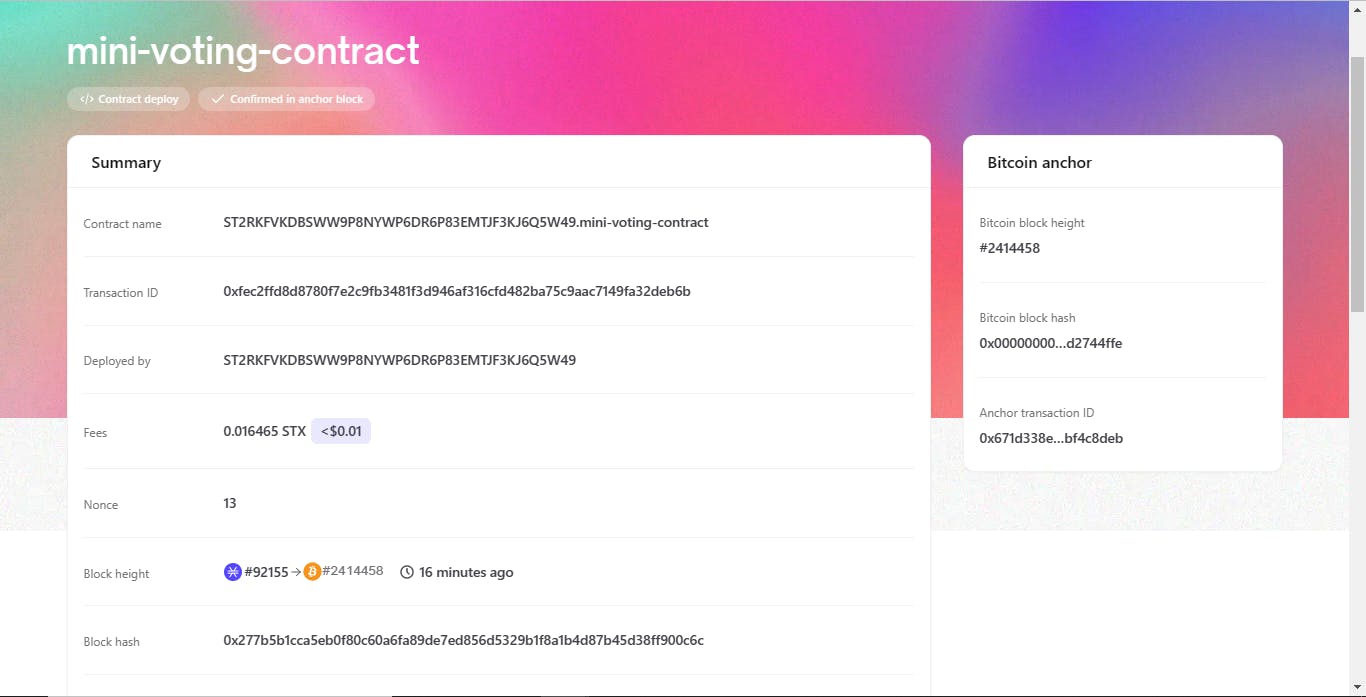
And that's it, we have successfully deployed our contract on Stacks' live testnet🥳
⚒️ Interacting with our Voting contract
Now let's interact with our voting contract on the Stacks test net.
To do this, visit Sandbox Explorer (a toolkit for exploring Clarity contracts)
Paste your STX address and enter your voting contract name in the input fields. Then click "Get Contract".
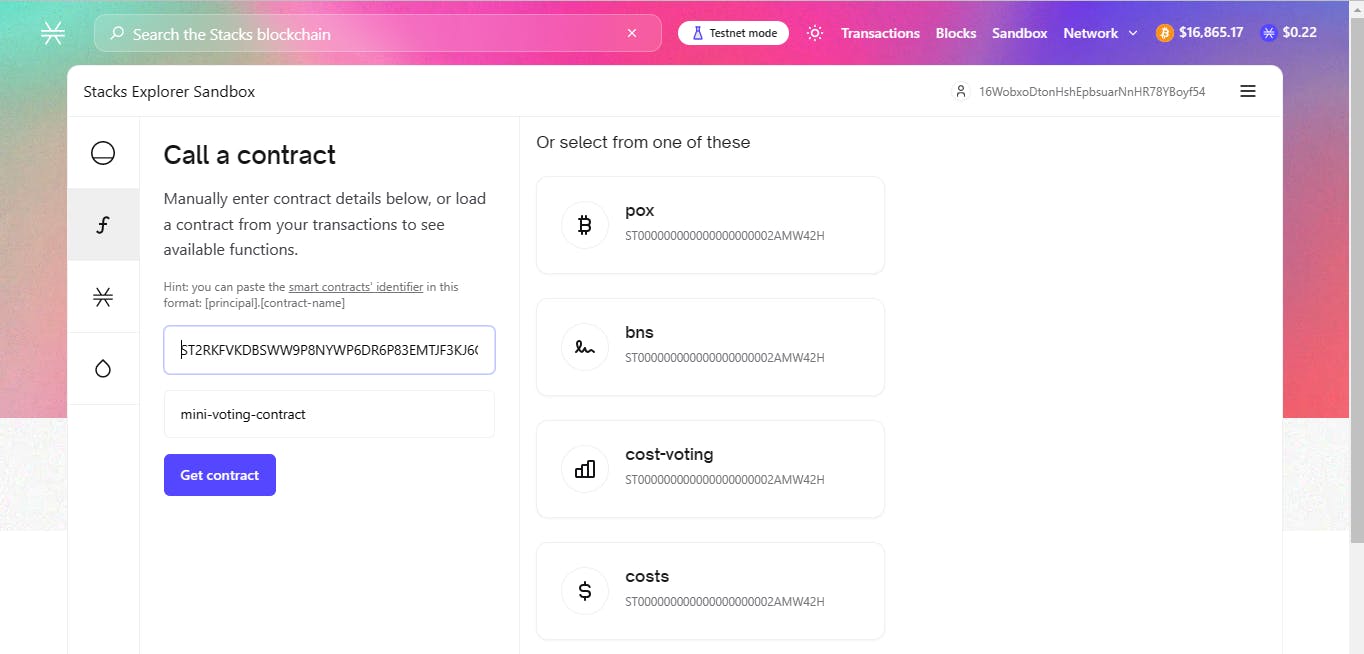
This gives us a cool interface to call our contract functions just like Etherscan, but here we need not verify our contract since clarity broadcasts our contract exactly how it was written.
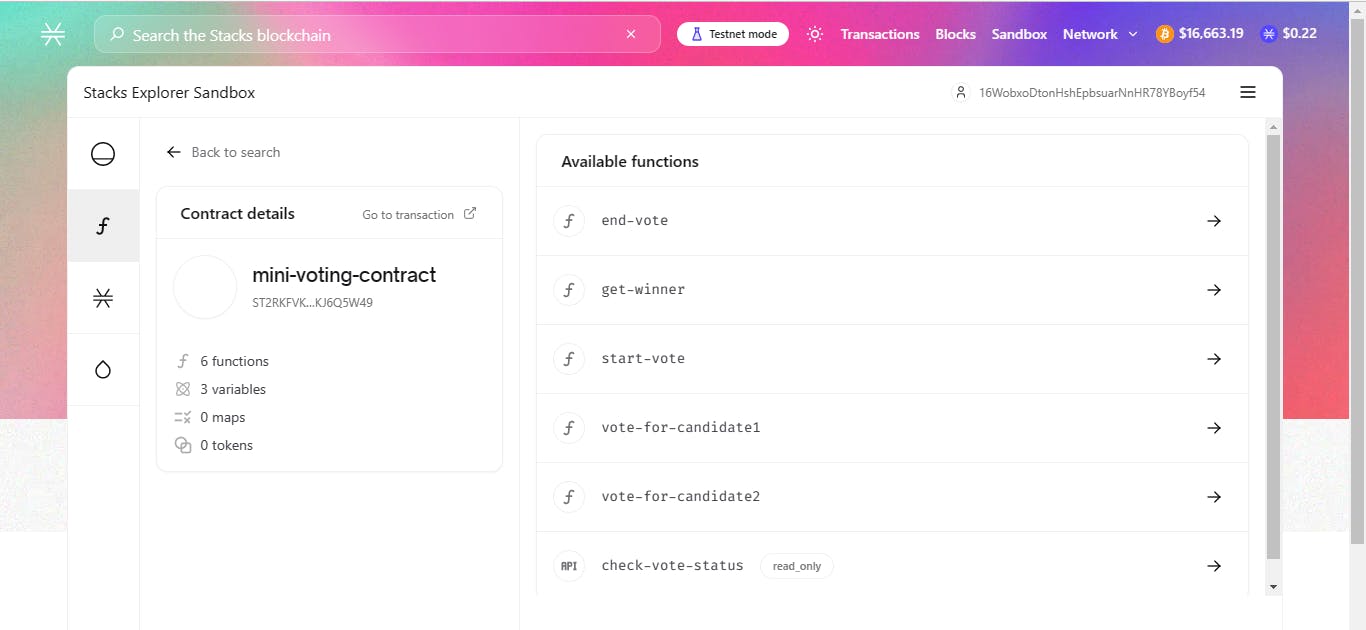
You can play around with the contract to test it out. But for this demonstration, we will call the
check-vote-statusread-only function before calling thestart-voteand call it again after to see if its value updates.Initial state:
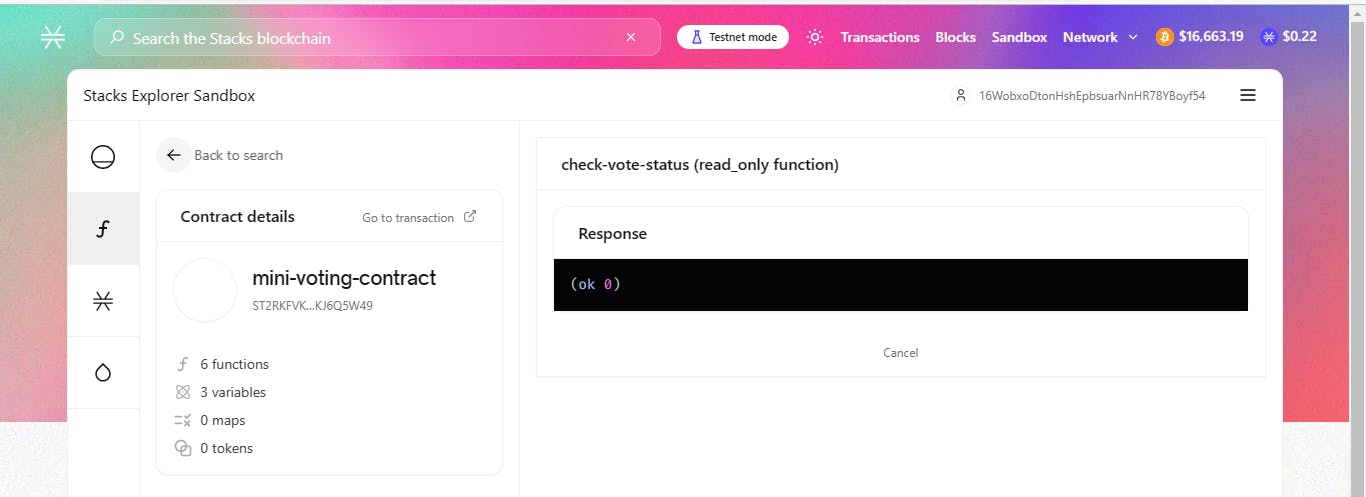
N.B: To call any function click it, then click "Call-Function"
Now let's call start-vote
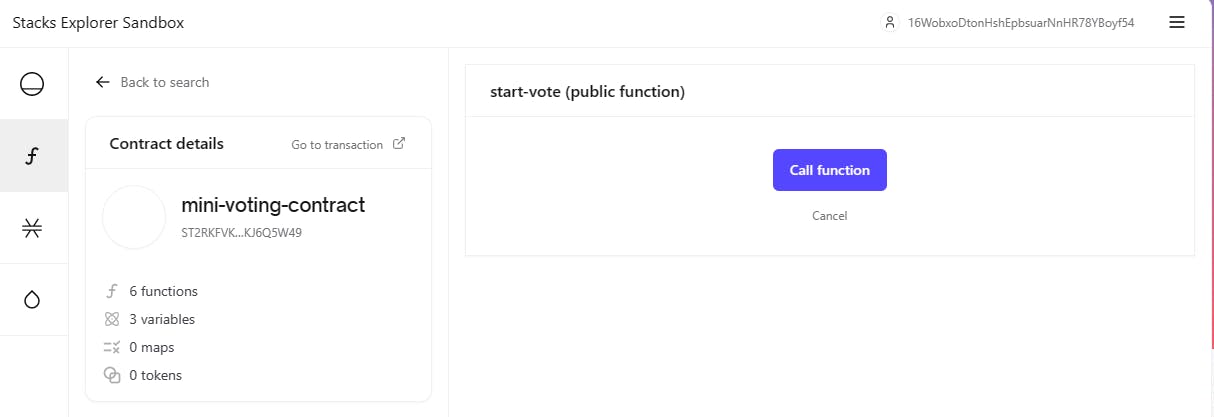
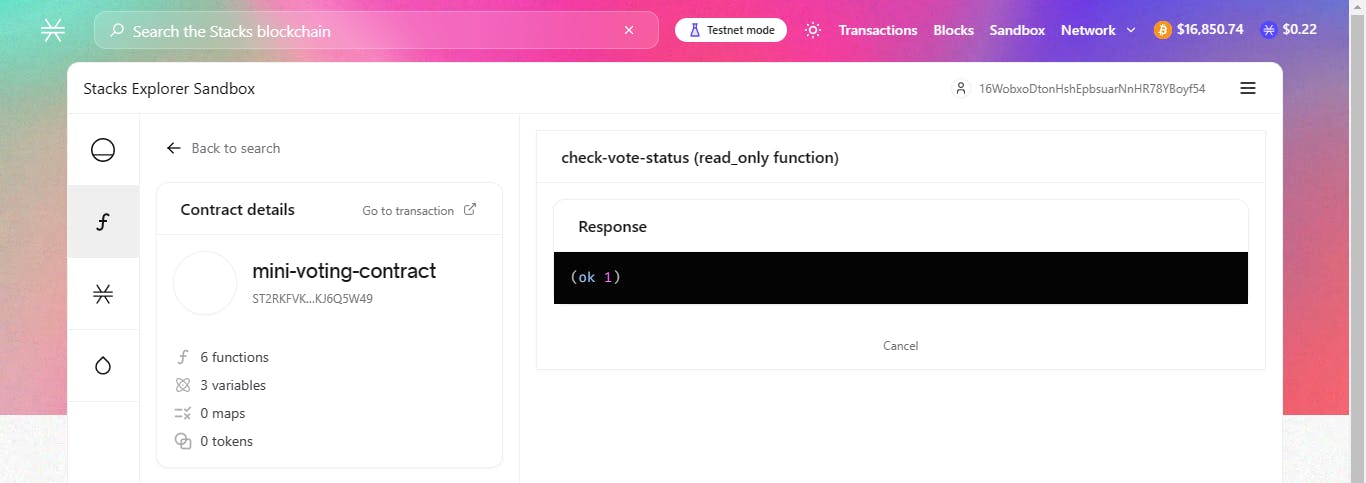
After calling check-vote-status again, we indeed see that our contract state updates - you may have to wait for some minutes for the start-vote call to be completed.
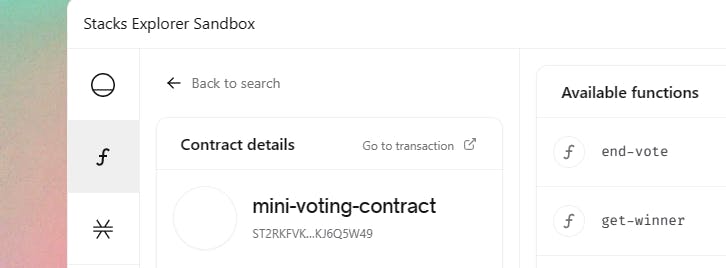
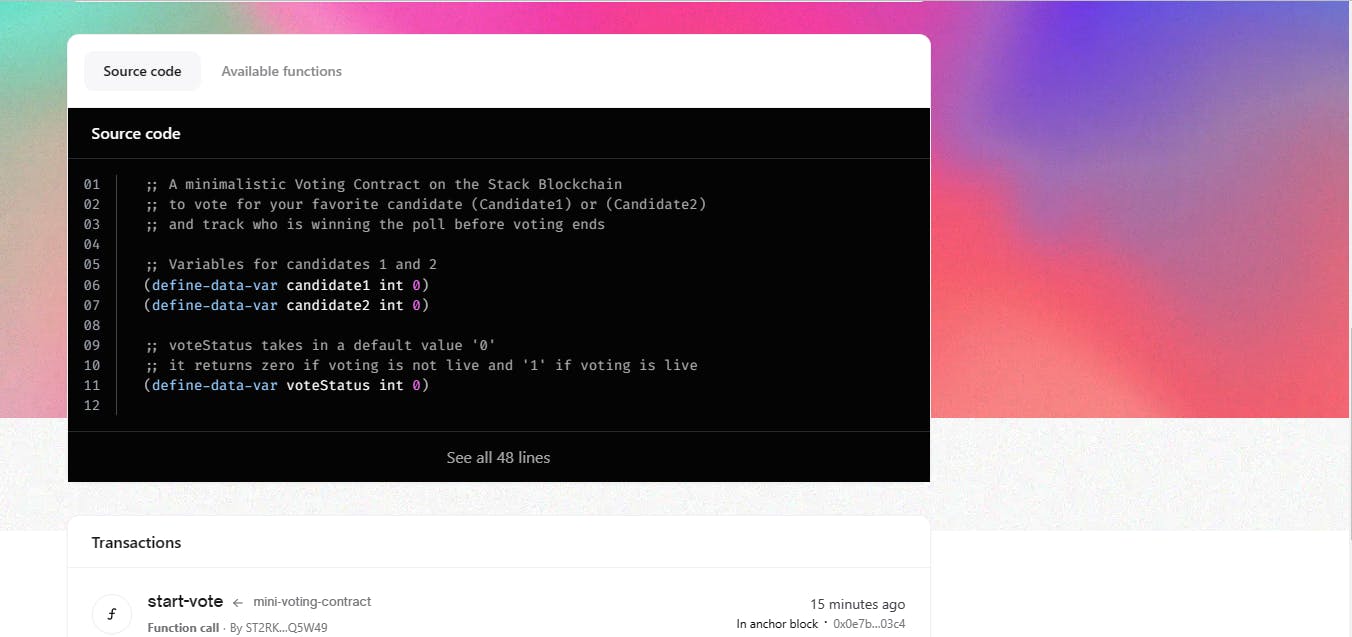
One final thing you should know here is that when you click on "Go to transaction" on the page below, you will be directed to your contract explorer where you'll be able to read your contract source code - as shown below.
🎉Congratulations!!!
You have now successfully written and deployed your first decentralized Voting Smart Contract on the Stacks blockchain using Clarity's Online IDE.
Finally...
By following this tutorial to this point, you now have a heavy confidence boost towards exploring the Stacks ecosystem and building powerful decentralized applications using Clarity.
Even though we have covered a whole lot in this article, there are still a couple of things we could do even better like:
Building our Contract and writing test scripts in a local development environment;
Kicking out the bugs in our code;
Writing a more advanced contract that reflects a real-world voting scenario; and
Using model frameworks like ExecutorDAO to quickly spin up decentralized autonomous voting contracts.
But, an attempt to fix all of these in one article would be quite a lot. So, I will be covering these topics in later articles.
Stay tuned ;)
Additional Resources
To learn more, check out:
Clarity of Mind: Comprehensive Book on Writing Clarity Contracts by Marvin Janssen
Also, check out:
An Introduction to Full-Stack Web3 Development with Stacks by Kenny Rogers
A Basic Voting Clarity Contract - This GitHub repo inspired the tutorial
Kindly share your thoughts in the comments ;)
WAGMI!🚀🚀

